Difference between revisions of "Laser Cut Gainesville Hackerspace Keychains"
Jump to navigation
Jump to search
| Line 1: | Line 1: | ||
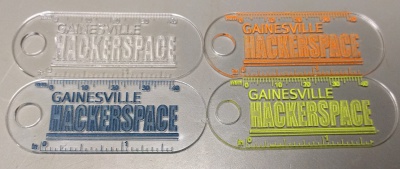
Keychains are a great gift to give guests visiting the Hackerspace, and it is a great project to learn how to use the laser cutter. The GCode has already been created for a few different sizes of acrylic, so if you want to skip straight to cutting you can start with [[#Premade Gcode Files|Premade Gcode Files]]. | Keychains are a great gift to give guests visiting the Hackerspace, and it is a great project to learn how to use the laser cutter. The GCode has already been created for a few different sizes of acrylic, so if you want to skip straight to cutting you can start with [[#Premade Gcode Files|Premade Gcode Files]]. | ||
| − | [[File:HackerspaceKeychains.jpg|border|right| | + | [[File:HackerspaceKeychains.jpg|border|right|400px|4 Keychains with Acrylic Paint]] |
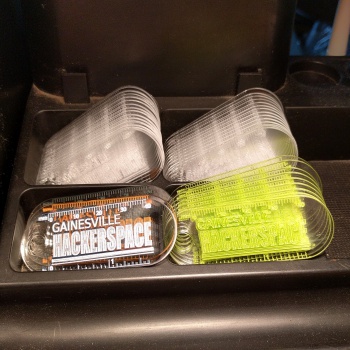
| − | [[File:KeychainsInHolder.jpg|border|right| | + | [[File:KeychainsInHolder.jpg|border|right|350px|Keychains in Holder]] |
Revision as of 12:49, 3 November 2018
Keychains are a great gift to give guests visiting the Hackerspace, and it is a great project to learn how to use the laser cutter. The GCode has already been created for a few different sizes of acrylic, so if you want to skip straight to cutting you can start with Premade Gcode Files.


Creating Toolpaths in CamBam
<Coming Soon>
Premade Gcode Files
GCode files have already been created for the following sizes of acrylic. Simply cut a piece of acrylic to one of the sizes (a bandsaw works great for that), and use the files listed.
196mm x 156mm, 0.008" thickness. 15 count, 1h 20m cut time
Creates 15 keychains with Rulers. Uses the (-3,-3)mm jig. File locations:
- /machinekit/Desktop/Hackerspace Keychains/Ruler_15count_196x156mm_0pt008in_Engrave.nc
- /machinekit/Desktop/Hackerspace Keychains/Ruler_15count_196x156mm_0pt008in_Cut.nc
How to cut using the Laser Cutter
For more detailed steps, see K40_Laser_Cutter.
Setting up the machine:
- Turn on power strips connected to the laser cutter
- Ensure water is flowing through pump below the cutter
- Turn on main motor power with the main red rocker switch on the cutter
- *Check that laser is off* by making sure the laser button is up
Insert Acrylic into Laser Cutter
- Insert the (-3,-3)mm Jig into the laser cutter
- Remove any film from both sides of the acrylic to be cut
- Insert the acrylic into the laser cutter, making sure to press the corner tight against the (-3,-3) jig.
Loading Gcode for Engrave Step
- Connect to the laser cutter by using VNC on a desktop (or laptop), and connecting to the IP Address of the laser (should be 192.168.1.16).
- Start linux CNC by clicking on the LinuxCNC icon on the desktop, and select *execute*
- Click the folder icon, and find the *_Engrave.nc file for your acrylic size
- Enable machine power in Linux CNC by clicking the yellow Machine Power icon in the top toolbar
- Home Laser Cutter by clicking the Home All button.
Starting Engrave Step
- Set the laser's power level to ~2.5mA, which is about 9 o'clock on the power knob. Adjust slightly if needed.
- Press laser engage button down to enable the laser. Make sure you are wearing polycarbonate safety glasses from this point on.
- Click the Run button in LinuxCNC to start engraving.
Loading Gcode for Cut Step
- Once engraving is finished, load the cut step by clicking the folder icon, and find the *_Cut.nc file for your acrylic size
- Set laser power 10mA, which is just before midnight on the power knob
- Click the Run button in LinuxCNC to start cutting.
Final Steps
- Turn off laser by making sure the laser button is up
- Remove keychains and cut acrylic from the laser
- Close LinuxCNC, close VNC viewer.
- Turn off power strip for the laser